Easy Crochet Frog Hat: Free Step-by-Step Beginner Pattern
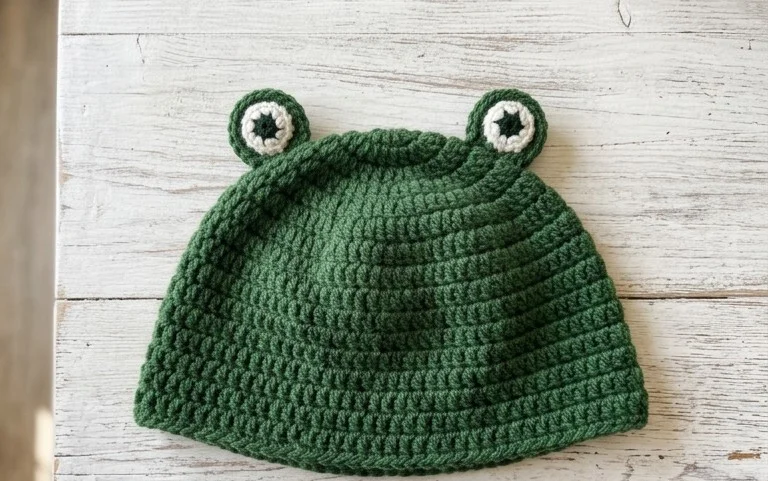
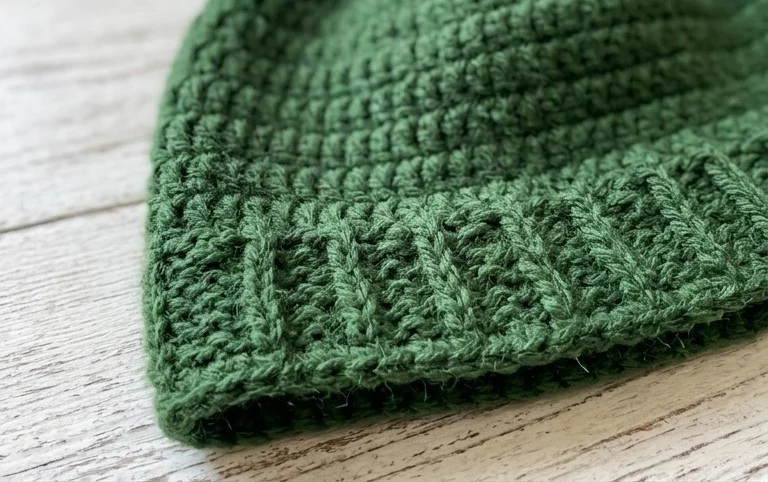
Bright green yarn coiled into a playful beanie brings a smile to anyone wearing this frog-inspired accessory. The finished hat has a soft, squishy feel that hugs the head comfortably without being too tight, making it a reliable choice for cold morning walks or long study sessions. You will work with a simple half double crochet stitch in the back loops to create a ribbed effect that looks like high-end knitwork. Beginners often appreciate how this project ignores complicated shaping, focusing instead on straight rows that fold into a cute, slouchy fit. This guide teaches you how to stitch, assemble, and add those signature frog features with confidence.
Why You’ll Love This Pattern
This classic crochet beanie works up quickly using a simple ribbed construction that creates a stretchy, comfortable fit for most adults. The pattern relies on half double crochet stitches worked into the back loops, which mimics the look of professional knitwear while maintaining the speed of crochet. Because the project is worked as a flat rectangle that is seamed at the end, it is an ideal choice for beginners practicing consistent tension. The texture is dense enough to provide warmth during winter months, and the project is small enough to finish in a single weekend. Many crocheters enjoy this design because it requires no complex shaping or crown decreases, making it a reliable staple for last-minute gifts.
I finished this hat in one sitting while watching a movie. It is so much easier than the patterns that require working in the round, and the final fit is perfectly slouchy.
— Sarah, hobbyist crocheter
Pattern Overview & Skill Level
- Skill Level: Beginner
- Approximate Time: 3 to 4 hours
- Construction: Flat rectangular panel worked in rows, folded, and seamed to form a tube
- Finished Dimensions & Sizing: 9 inches tall by 10 inches wide (laid flat), fits most adult head sizes
Materials & Supplies Needed
- Yarn: Worsted weight (#4), wool or acrylic blend, approximately 200 yards in your preferred color
- Hook Size: 5.5 mm (US I-9)
- Notions: Tapestry needle for seaming, scissors, and a measuring tape
- Safe yarn substitutions: You can use any worsted weight yarn, though 100% wool will offer more warmth and elasticity. Cotton yarn is a safe alternative but will result in a heavier hat with less natural stretch.
Stitch Guide & Abbreviations (US Terms)
- ch: chain
- hdc: half double crochet
- BLO: back loop only (inserting the hook only under the back loop of the stitch instead of both loops)
- sl st: slip stitch
- st/sts: stitch/stitches
The BLO Technique
Working in the back loop only is the key to creating the ribbing effect. When you look at the top of your stitch, you see two loops. By inserting your hook into the loop furthest away from you, the front loop is left exposed, which creates a raised ridge that allows the fabric to stretch horizontally.
Step-by-Step Pattern Instructions
Main Hat Panel
- Row 1: Ch 42. Hdc in the third ch from the hook and each ch across. (40 sts)
- Row 2: Ch 2 (does not count as a stitch), turn. Hdc in the BLO of each st across. (40 sts)
- Rows 3–50: Repeat Row 2 until the piece measures approximately 20 inches in length or fits comfortably around the head circumference.
- Finishing: Fasten off, leaving a 15-inch tail for sewing.
Assembly and Closing
- Side Seam: Fold the rectangle in half, matching the short ends together. Use the tapestry needle and the long tail to sew the short sides together using a whip stitch or mattress stitch.
- Crown Closure: With your yarn needle and a separate 12-inch piece of yarn, weave the yarn in and out of the top edge of the tube. Pull the tail tight to cinch the top of the hat closed like a drawstring bag. Secure with a knot and weave in the end.
- Final Step: Turn the hat right side out and add a pom-pom if desired.
Care & Washing Instructions
- Hand wash in cool water using a mild wool-safe detergent.
- Lay the hat flat on a dry towel to air dry, reshaping it gently while damp.
- Do not hang to dry, as the weight of the water can cause the ribbed stitches to stretch out of shape permanently.
Pro Tips & Common Mistakes to Avoid
- Maintain consistent tension, especially at the end of each row, to ensure your edges remain straight and the seam is not bulky.
- Use a stitch marker in the first stitch of every row to avoid accidentally dropping stitches, which is a common mistake when working in the back loops.
- Weave your yarn ends into the underside of the stitches using a tapestry needle to ensure they stay hidden and secure after repeated washings.
- Adjust the size by changing your initial chain count. Adding more chains increases the height of the hat, while adding more rows increases the circumference. Note that changing the size will alter the total yardage needed.
Frequently Asked Questions
Can I use a larger hook for this pattern?
Using a larger hook will make the fabric drapier and slightly larger, but it may also create gaps in the stitches that let cold air through. It is best to stick to the hook size recommended for your specific yarn weight.
How do I adjust this pattern for a child’s size?
To make the hat smaller, simply chain 32 instead of 42 for the initial row and work fewer rows until the circumference fits the child’s head. Everything else remains the same.
Is this pattern suitable for beginners?
Yes, this is an excellent first project because it uses only the half double crochet stitch and requires no shaping or counting of complex rounds.
Can I sell the hats I make from this pattern?
You are welcome to sell finished items made from this pattern, but please credit the design and use your own photographs when listing them for sale.
Finishing this whimsical frog hat brings a sense of accomplishment, especially when you see those googly eyes perched on top of your warm, handmade headwear. You can easily adapt this project for a smaller head by reducing the initial chain length or swapping the wool for a cotton blend if you prefer a lighter, seasonal version. Please post a photo of your finished work online to inspire other makers in the community. You are welcome to browse the full archive of free patterns on the blog whenever you are ready for your next project.